Sync your R Projects to GitHub with Confidence!
SSC Virtual Skills Workshop - February 3, 2026
Welcome!
Welcome to today’s SSC Virtual Skills Workshop.
I’m Grace! I’m a;
Recent Biostatistics PhD graduate (University of Waterloo, 2025)
New Assistant Professor of Teaching (UBC, July 2025)
Person who suffered greatly trying to learn how to use GitHub 🫠

Git
A free, open source version control system designed to track changes
Creates “snapshots” of your work as your progress through a project
GitHub
Cloud-based platform for storing, managing, and collaborating
Uses Git (hence the name)!

Part 1: Set Up
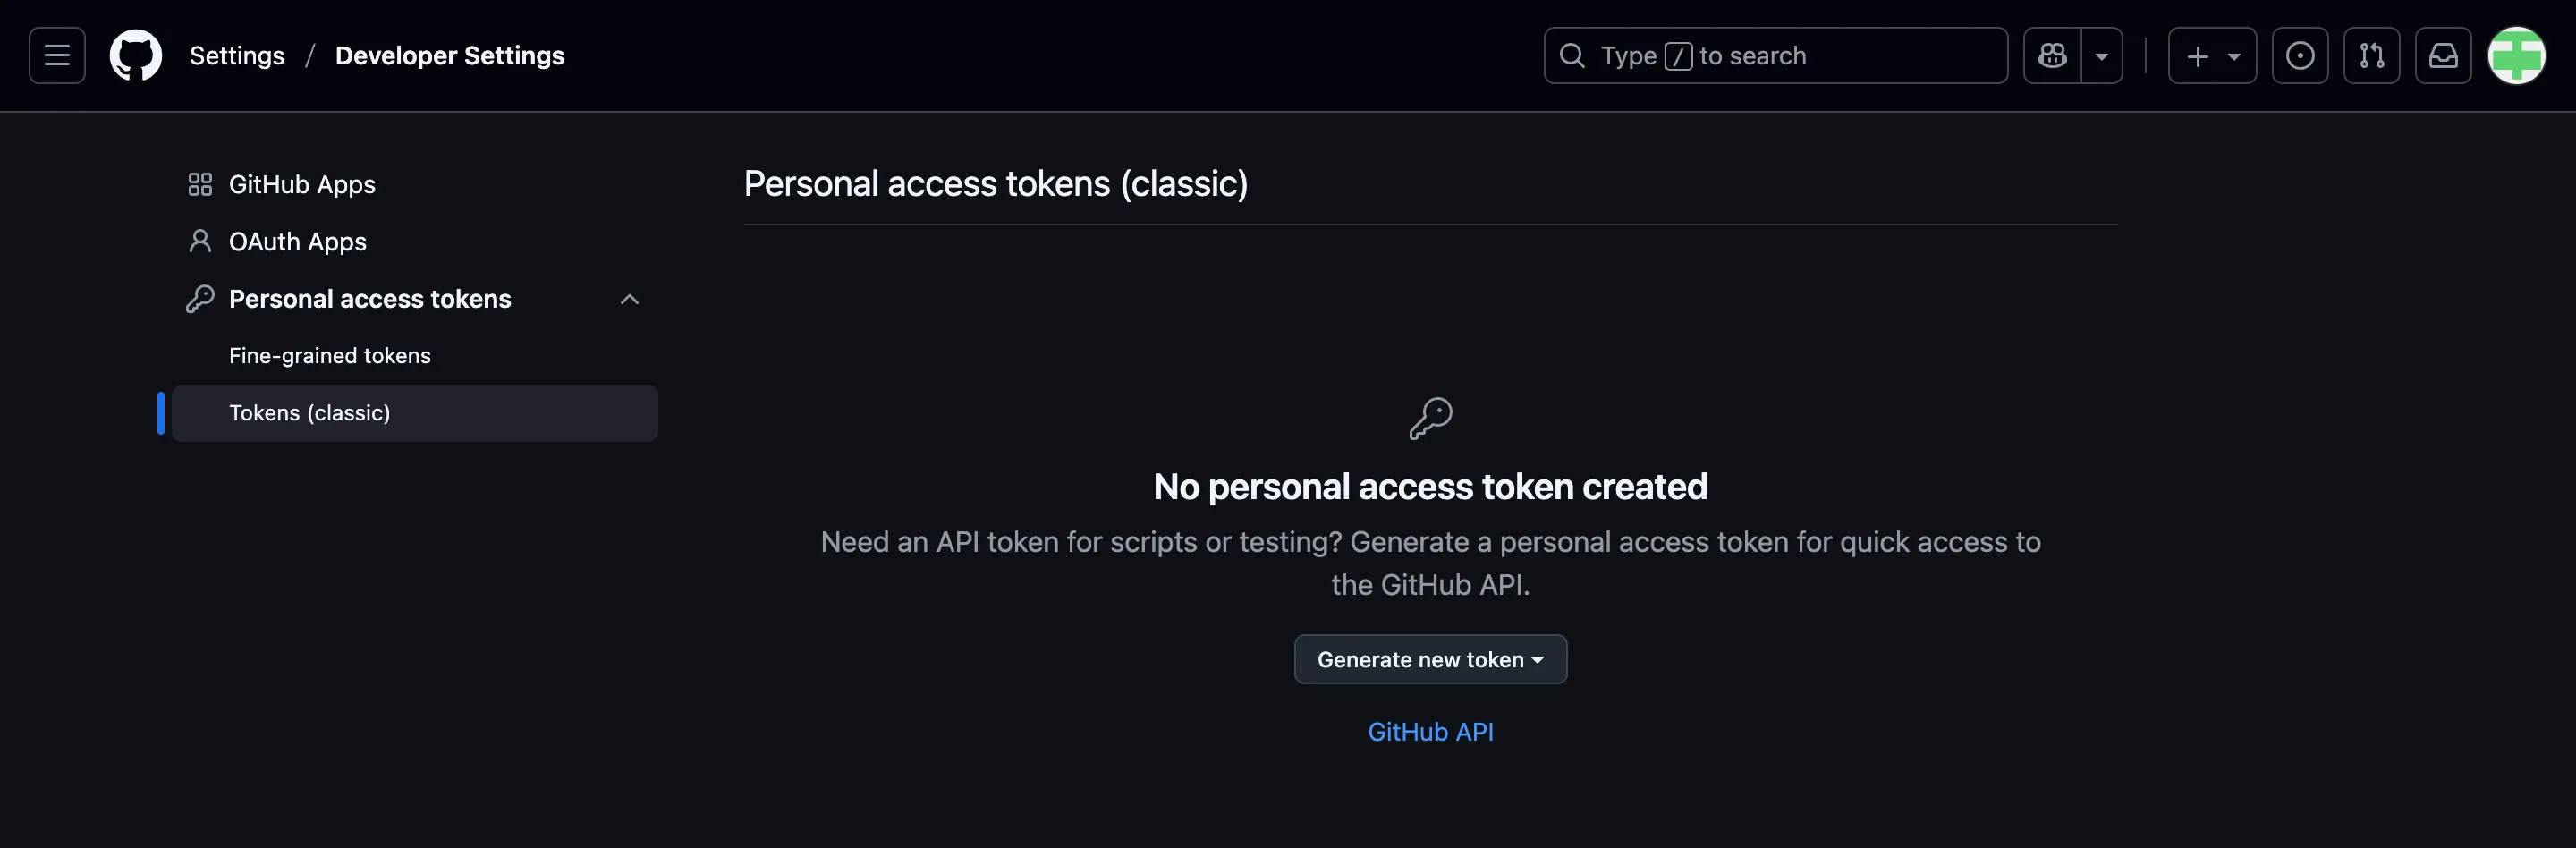
Step 1.4: Configure Your Personal Access Token (PAT)
Option 1: Go to to https://github.com/settings/tokens and click “Generate token”.
Choose Classic Token
Describe the token’s purpose in the Note field, e.g. “personal-macbook” or “Stat545Installation”
Select “repo”, “user”, and “workflow” for scopes
Set an expiry date (can regenerate tokens later)
Save this token somewhere so you can use it again later, such as a password manager
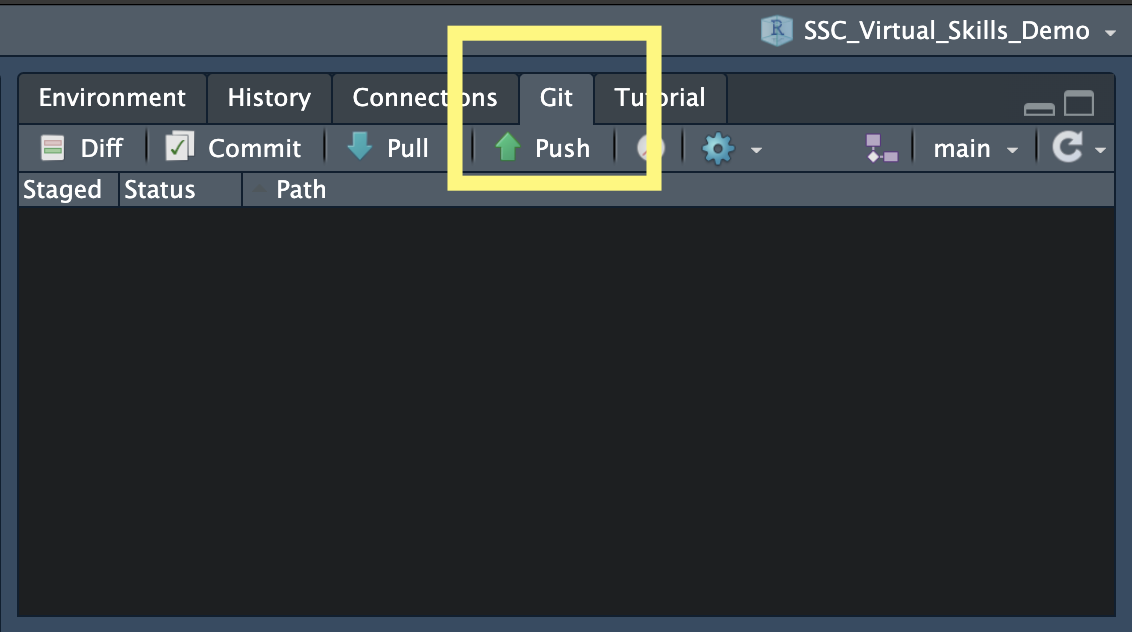
Part 2: Connect GitHub to an Existing R Project
You should now see a “Git” pane by your Environment/History/Connections.
Part 3: Sync Changes from your Computer
Step 3.1: Make some local changes
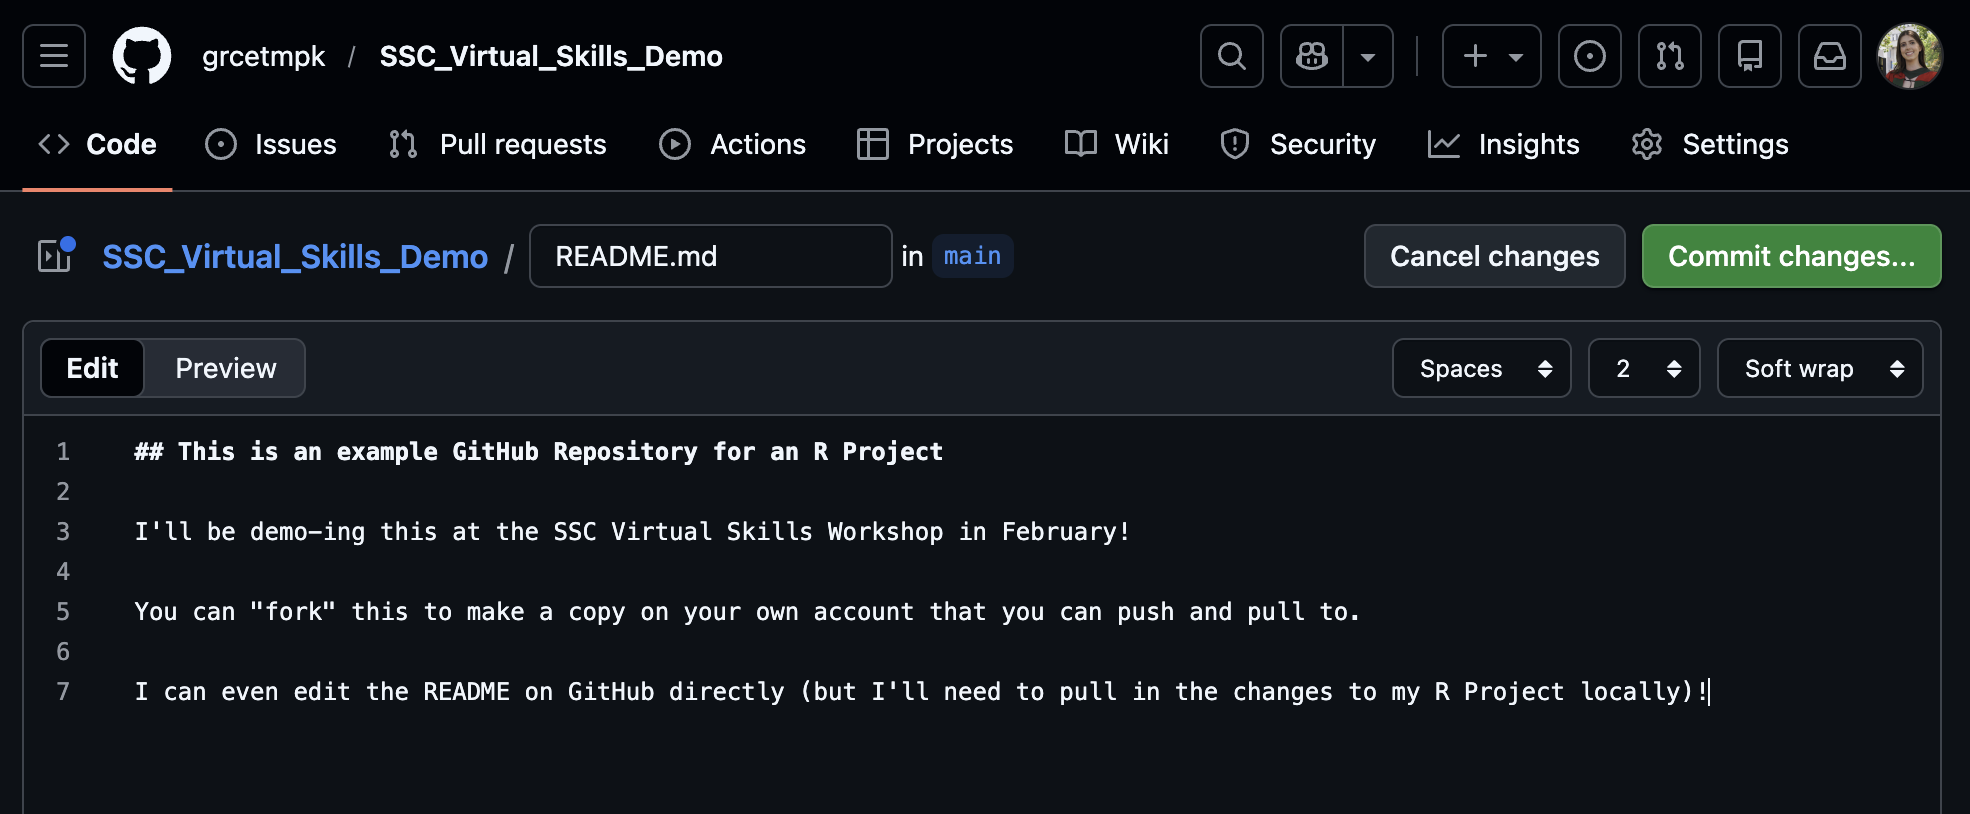
Edit and save the changes you make to any file in your repository
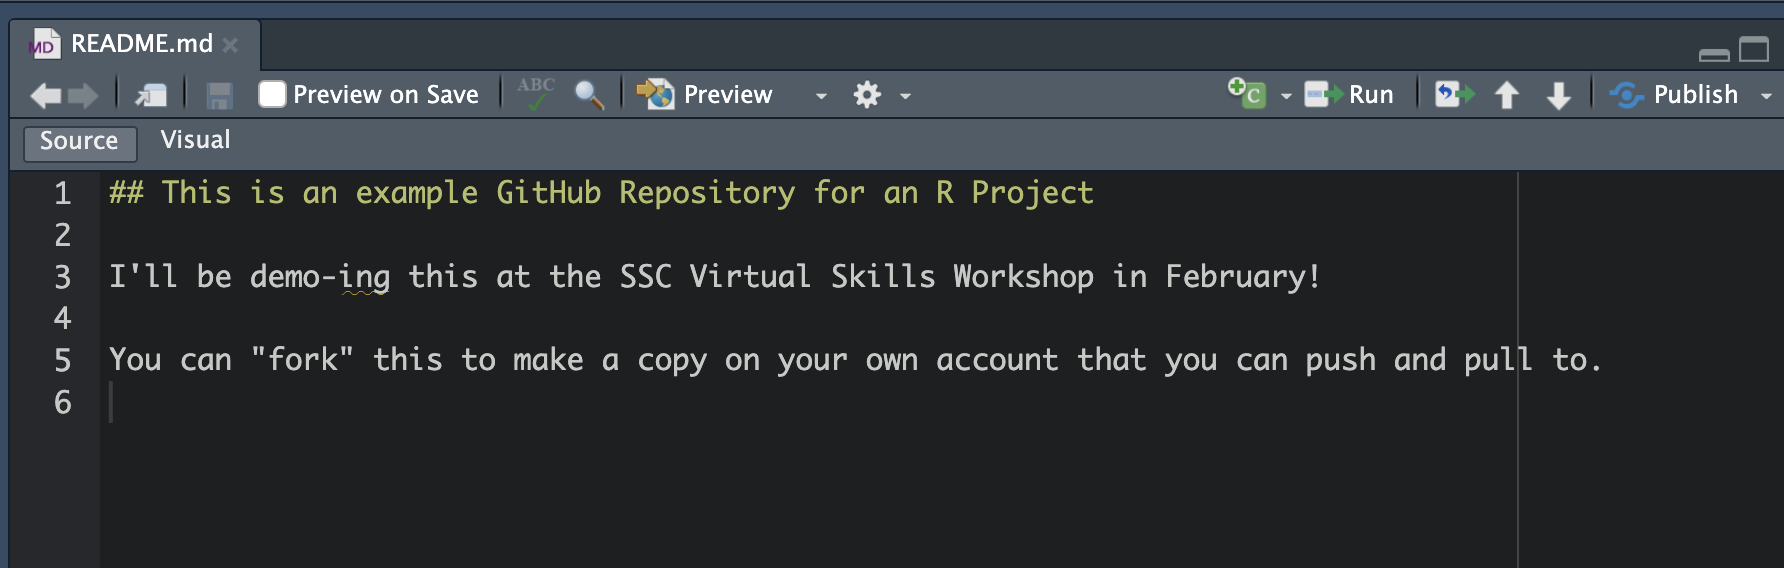
Do you have a README file yet? If not, create a new Markdown (not RMarkdown) document named README.md. Use markdown syntax to create a header that contains your repository name and a brief description in plain text.
The README file will show up on the home page of your repository on GitHub!
![]()
Part 3: Sync Changes from your Computer
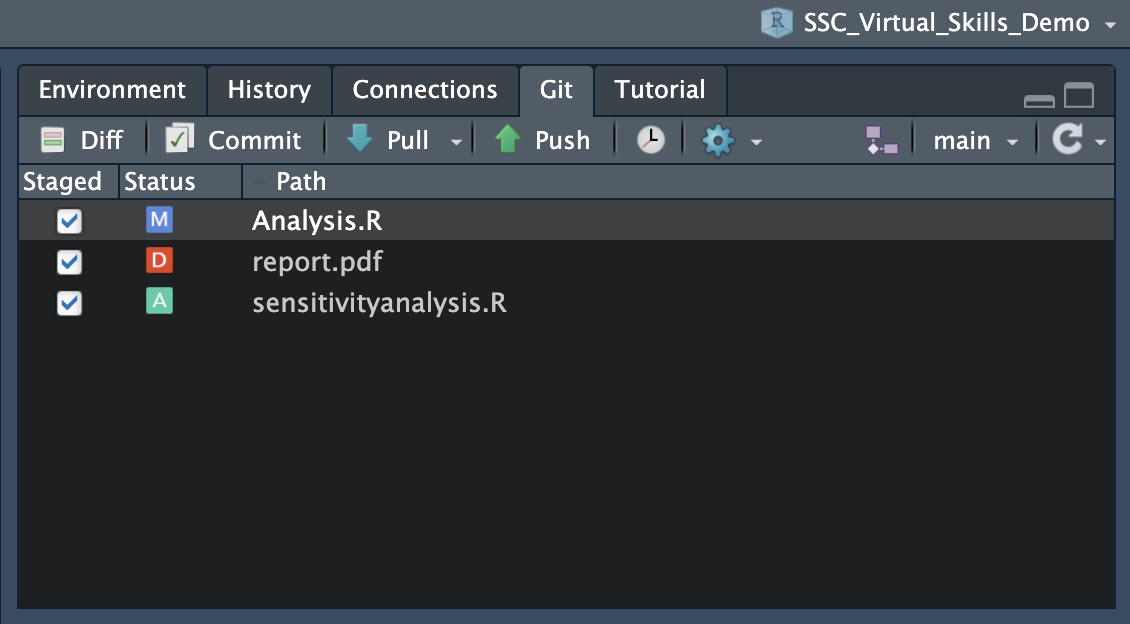
Step 3.2: Stage Files
Option 1 (Using the Git Pane)
Select the files you want to stage by selecting them.
You will see symbols beside them - “A” stands for “Added” and “M” stands for “modified”. If you were to delete a file, you would see a red “D”.
![]()
Part 3: Sync Changes from your Computer
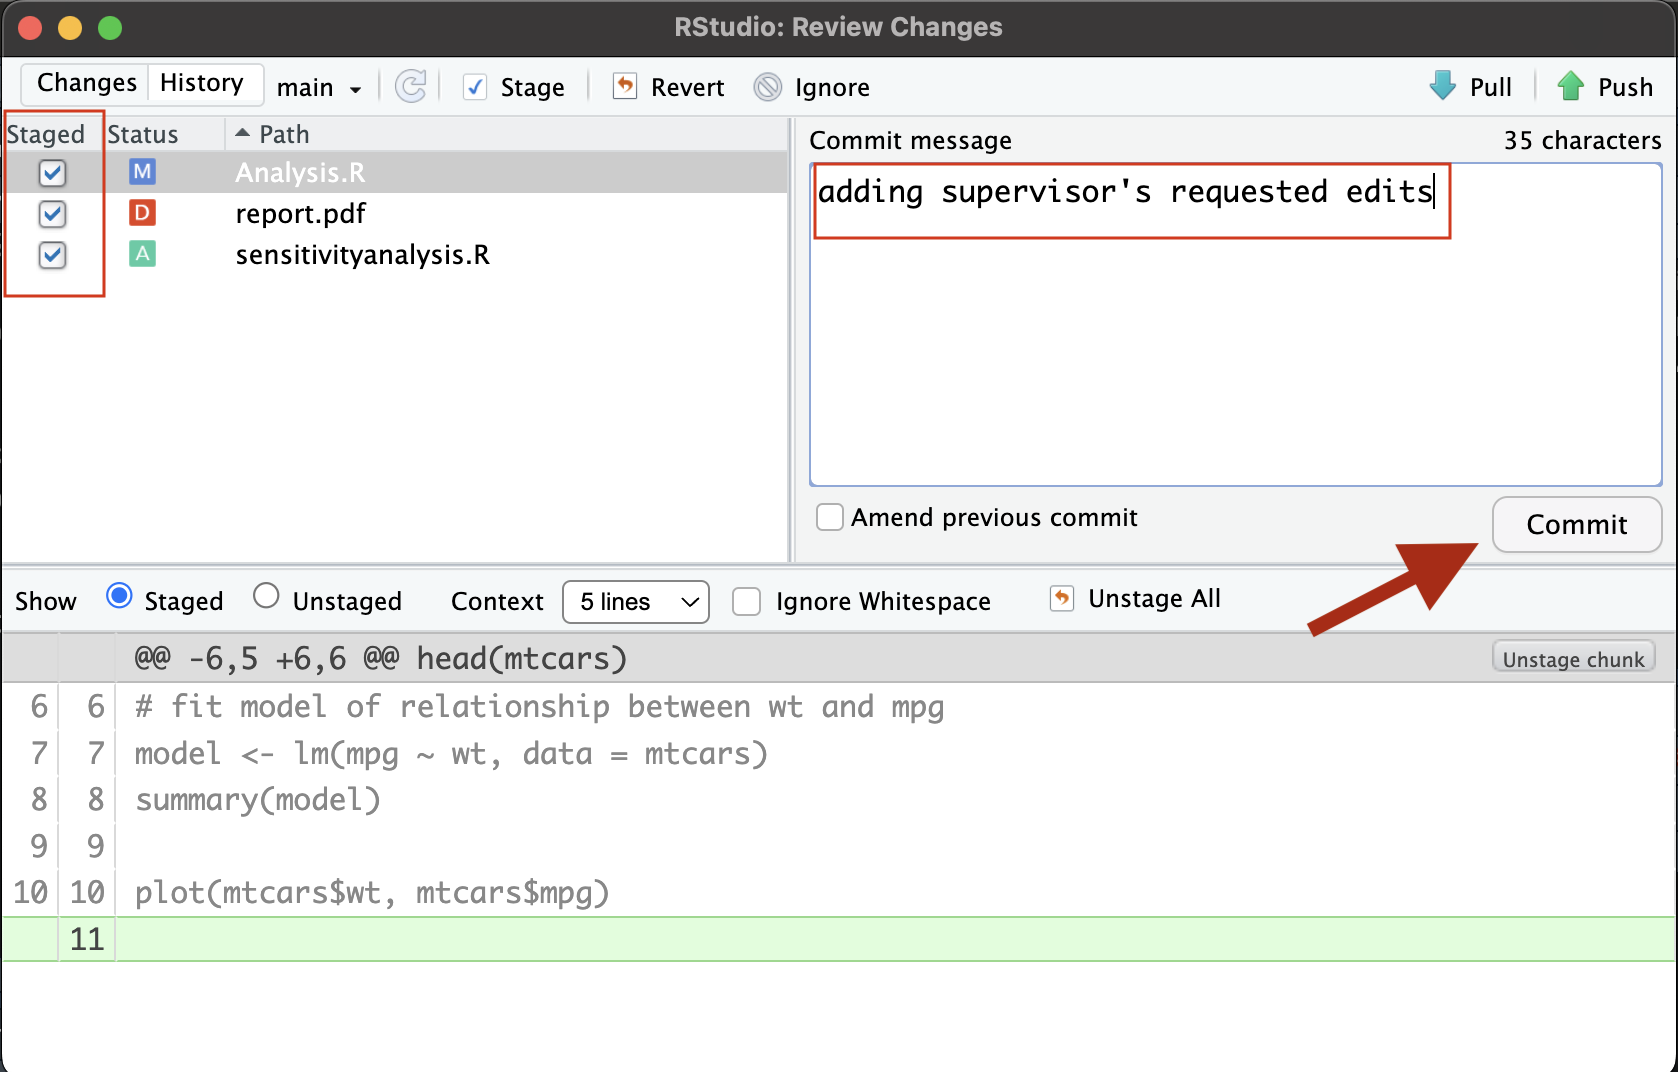
Step 3.3: Commit Changes (save a snapshot of your work!)
Option 1 (Using the Git Pane)
Click the Commit button.
Add a message explaining the changes
Click Commit. Close this pop-up.
![]()
Part 3: Sync Changes from your Computer
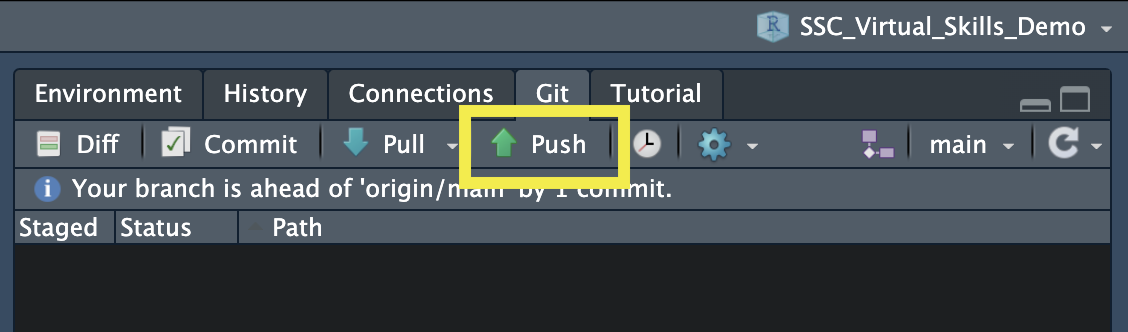
Step 3.4: Push the Changes to GitHub
Option 1 (Using the Git Pane)
Click the Push button
![]()
Part 3: Sync Changes from your Computer
Step 3.4: Push the Changes to GitHub (cont’d)
Option 2 (Using the Terminal)
- Run
git push origin <branchname>in the Terminal<branchname> is typically
mainormaster. You find the branch name in the Git pane or by usinggit statusIn my example, I would run
git push origin main![]()
- Run

Part 3: Sync Changes from your Computer
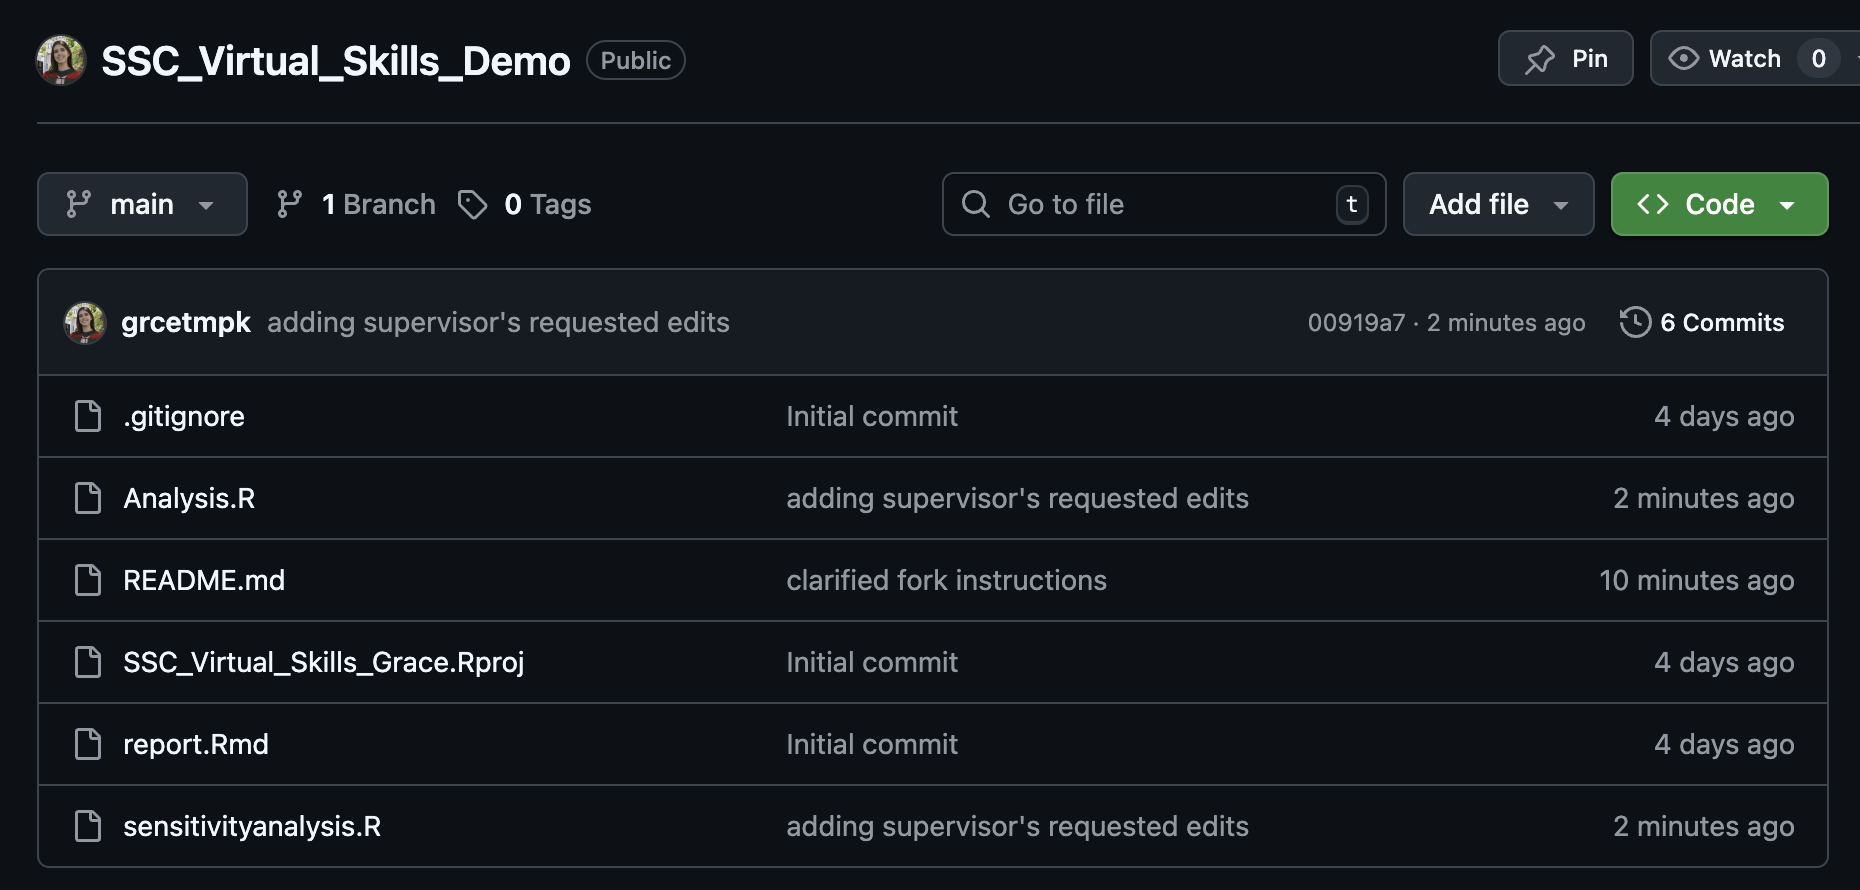
After pushing, you should be able to see the updates on your GitHub repository!
Notice the message beside your changed files - those are your commit messages!
![]()
Part 4: Pull Changes from GitHub
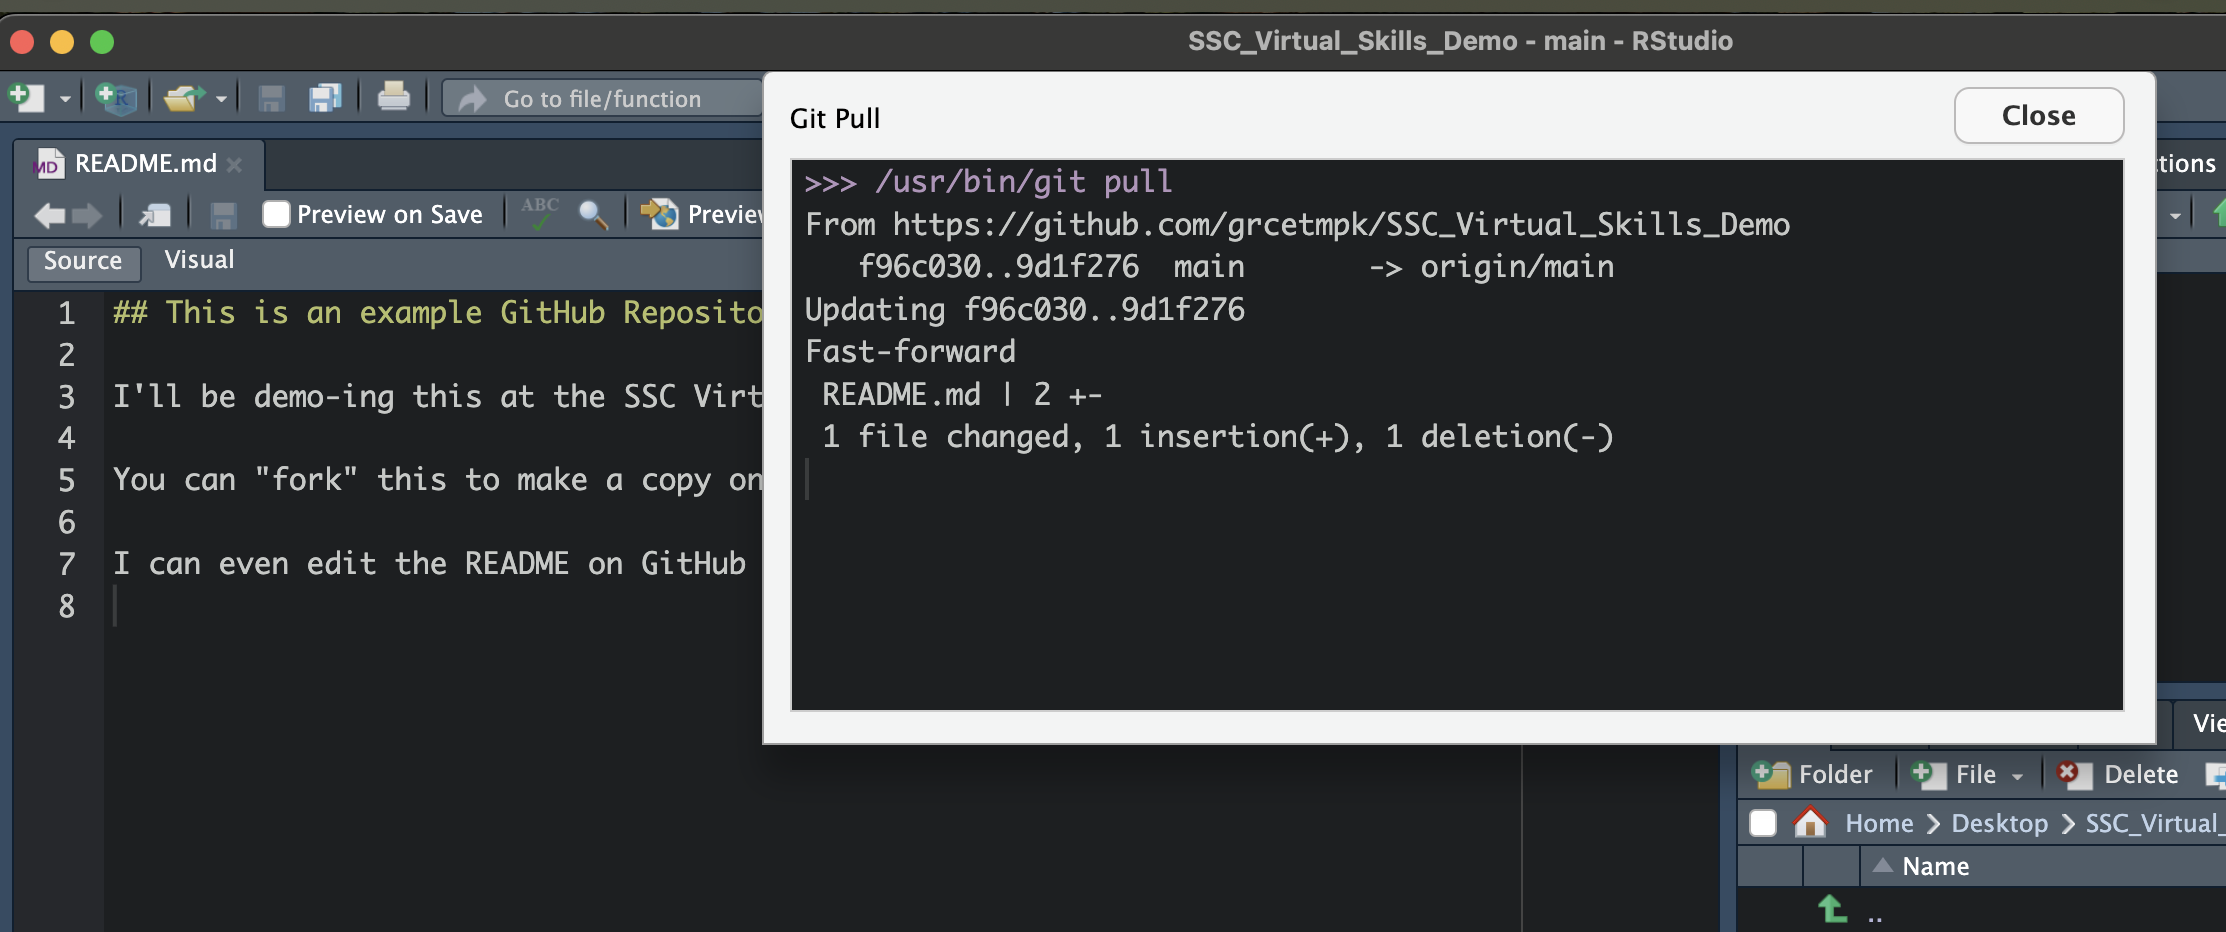
Perhaps you made a change directly on GitHub, or a collaborator pushed changes to Github
These changes are not automatically shown on your local version of your R Project
You need to pull these changes from GitHub to your local version
Part 4: Pull Changes from GitHub
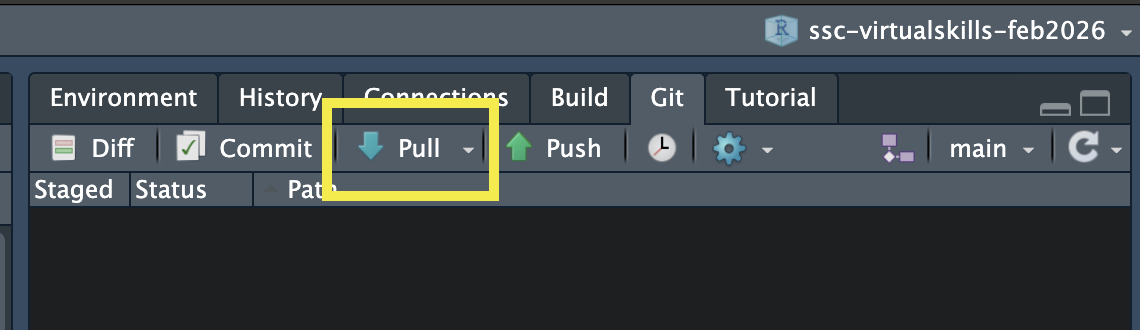
Step 4.1: Pull
Option 1 (Using the Git Pane)
Click the Push button
![]()
![]()
Part 5: Cloning
Step 5.1: Copy link to repository
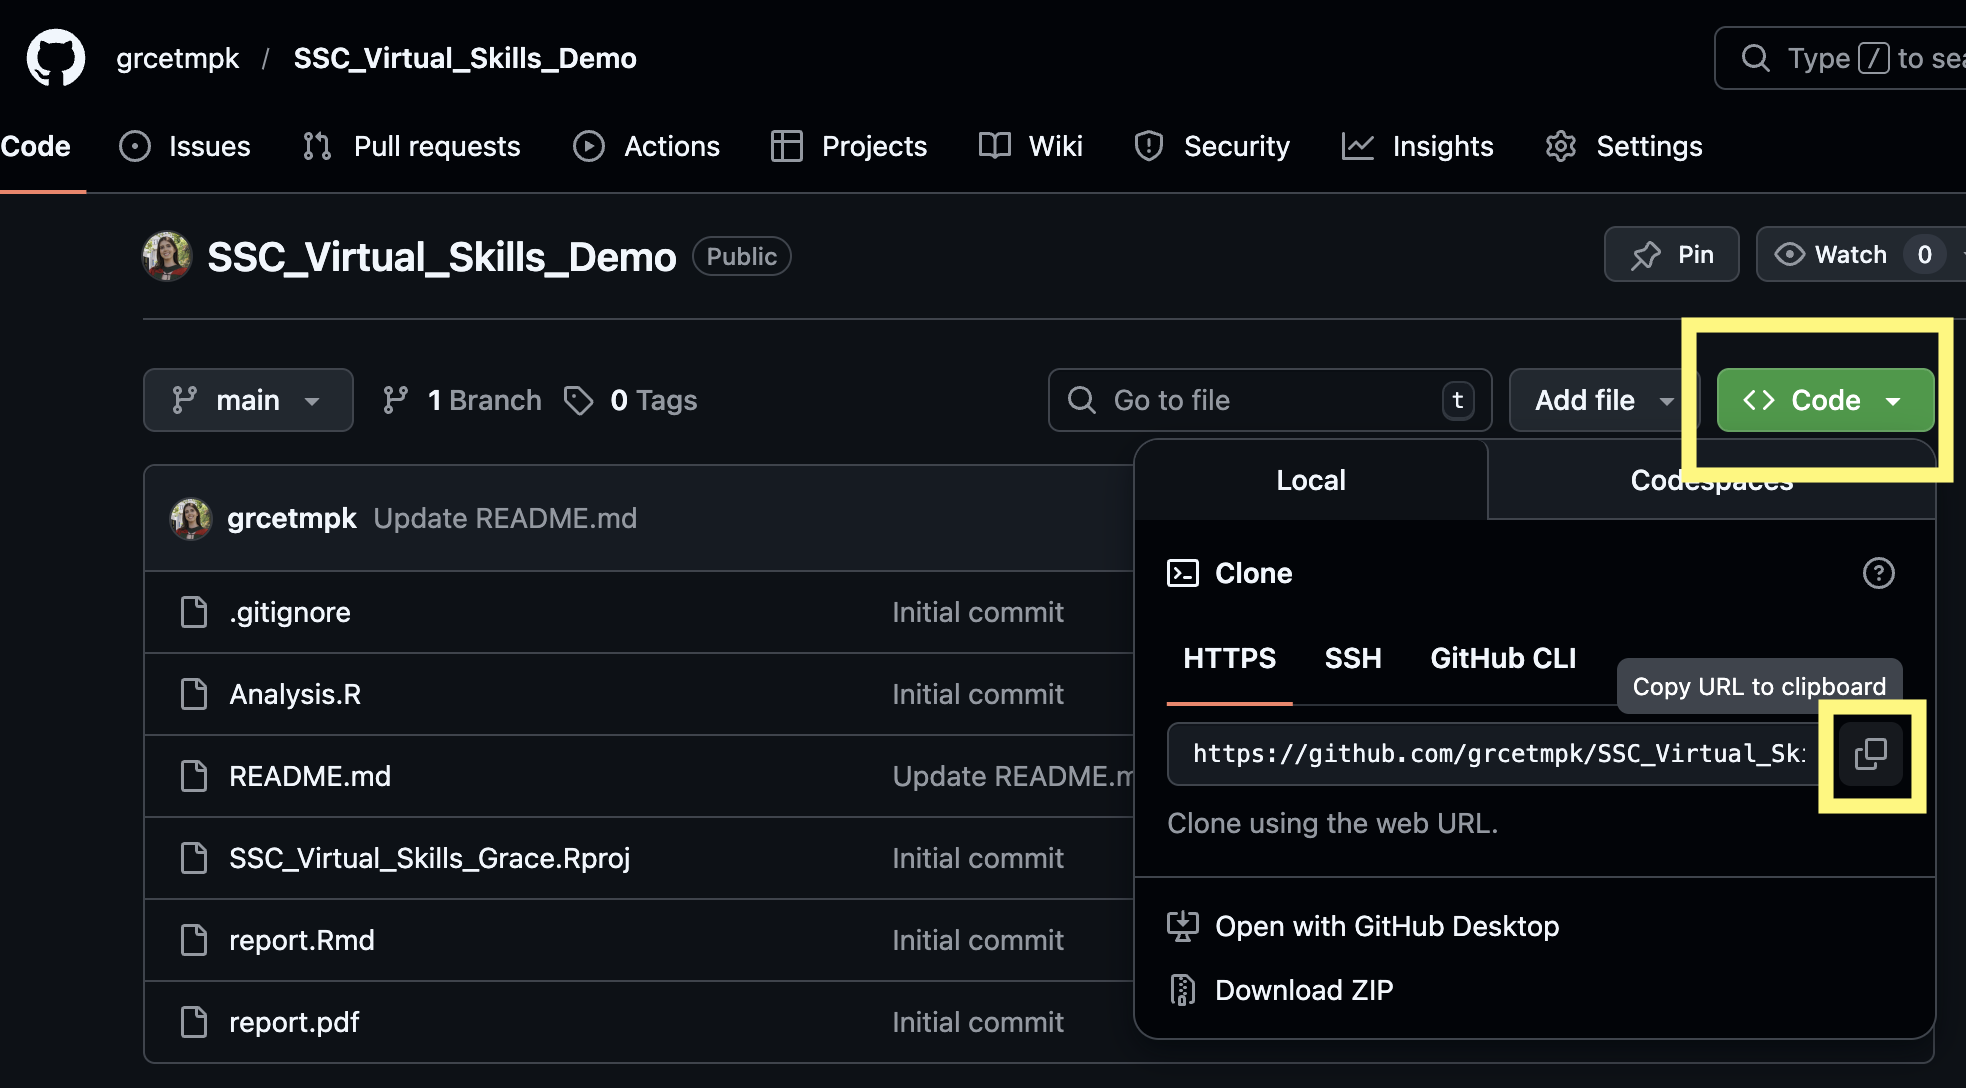
- Navigate to the repository you want to clone on GitHub.
- Clicking the green “Code” button to copy the address of the repository.
Part 5: Cloning
Step 5.2: Clone the Repository
In RStudio, go to “File > New Project”
Click on “Version Control: Checkout a project from a version control repository”
Click on “Git: Clone a project from a repository”
Fill in the details:
URL: use the HTTPS address (from Step 5.1)
Create as a subdirectory of: Browse to where you would like to save this repository on your machine (creates a new folder in the location you select)
![]()

Part 5: Cloning
Now you have a local version of this project!
If you have permission to, you can push and pull the same as in Part 4!
